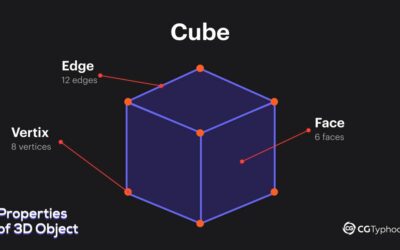
AI for 3D modeling lets you create 3D models from text prompts, images, or photos in minutes using AI tools. Modern AI 3D model generators are widely used in game development, animation, and design to speed up production workflows.
Intro
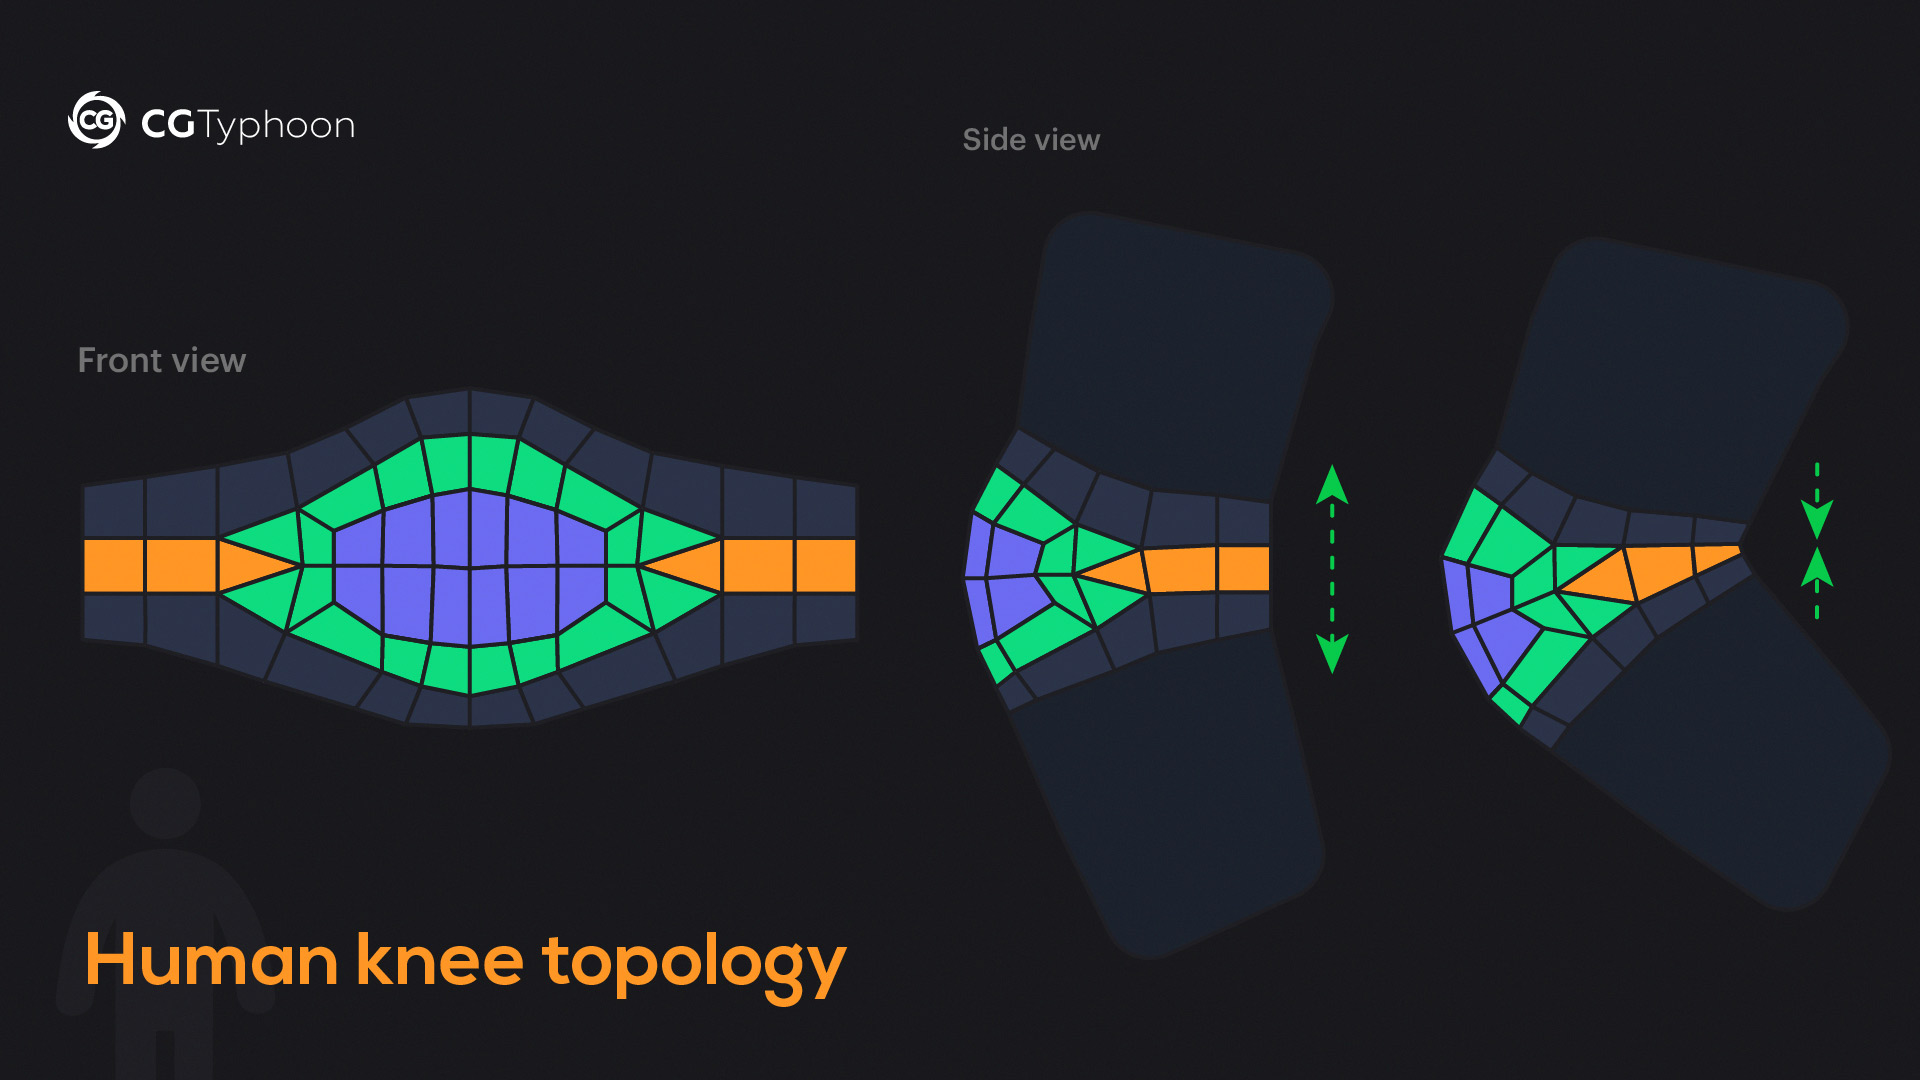
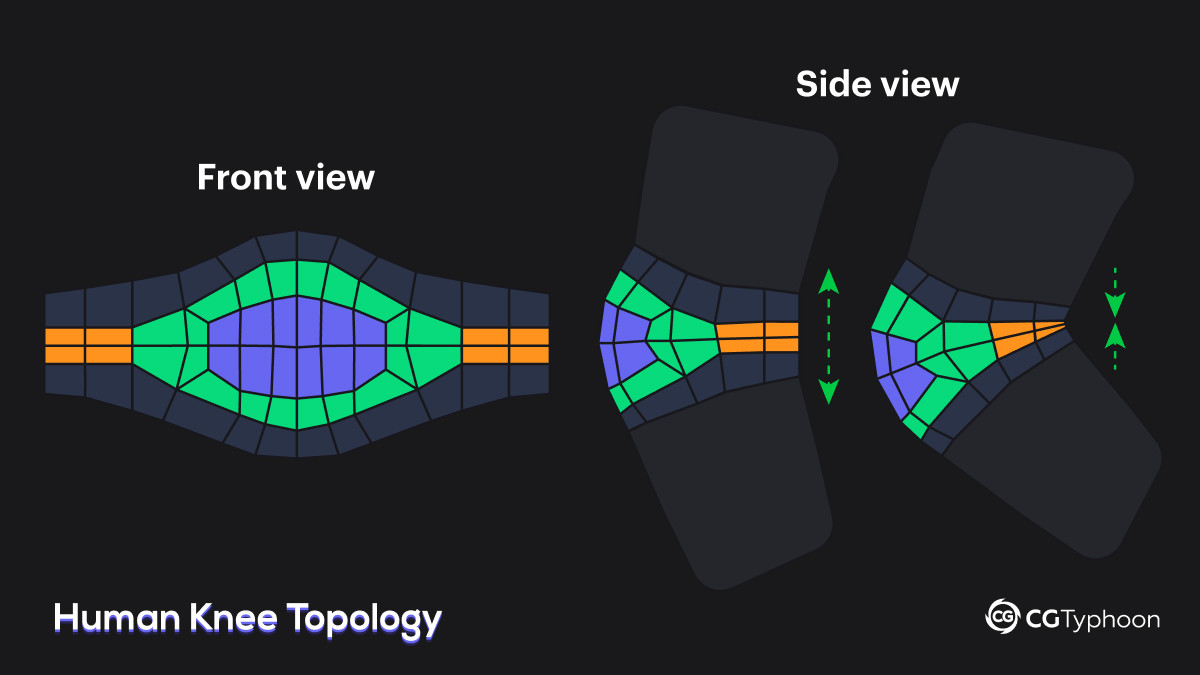
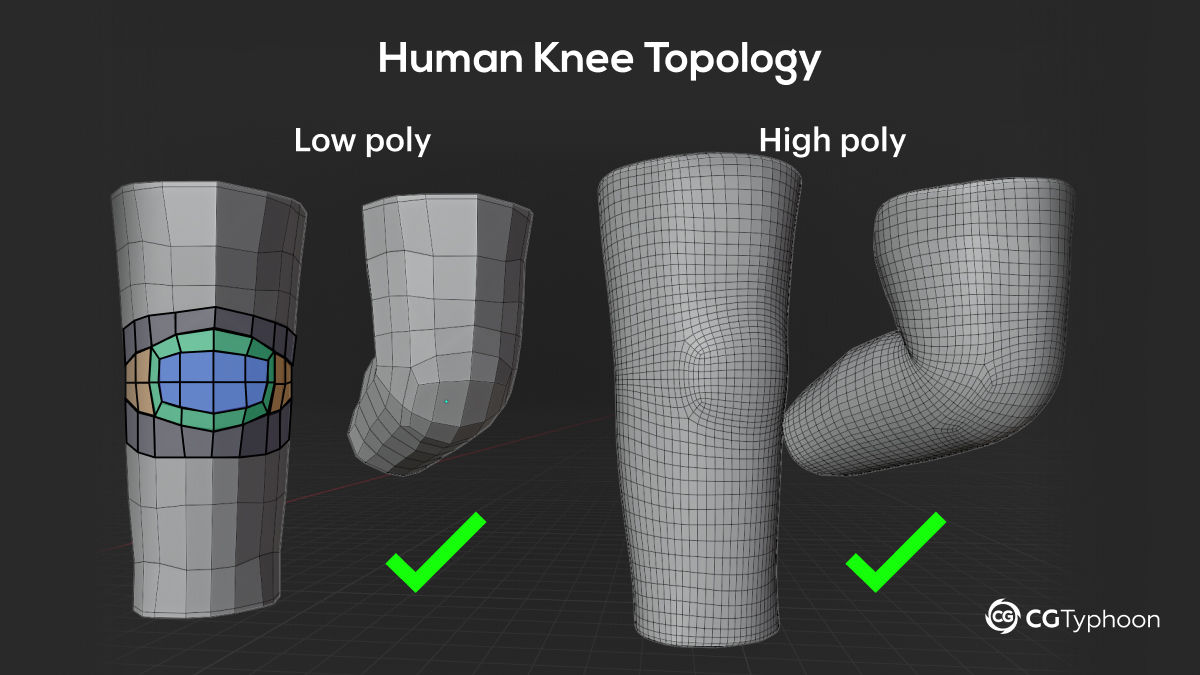
Human knee topology is one of the most important parts of character modeling for animation and rigging. The knee joint constantly changes shape during movement, which makes it one of the hardest deformation areas in 3D character topology.
If the edge flow is poorly designed, the mesh can start stretching, collapsing, or creating shading artifacts when the leg bends. Proper knee topology helps preserve volume, maintain clean deformation, and improve skinning results in Blender, Maya, ZBrush, and other 3D software.
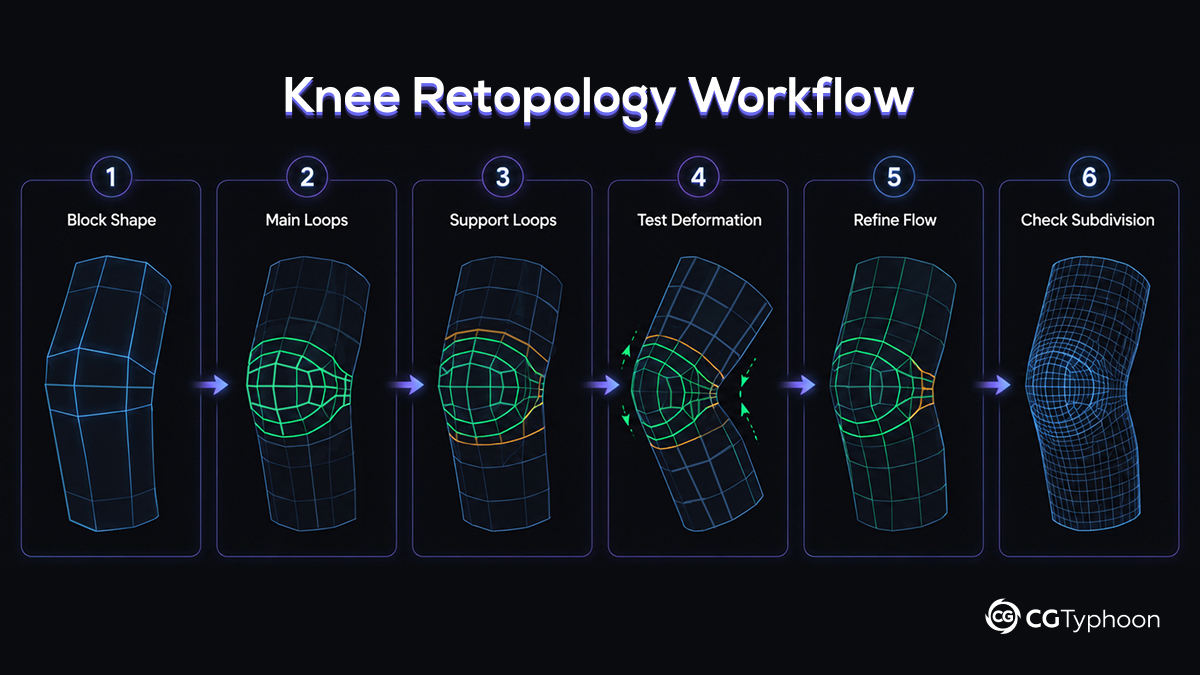
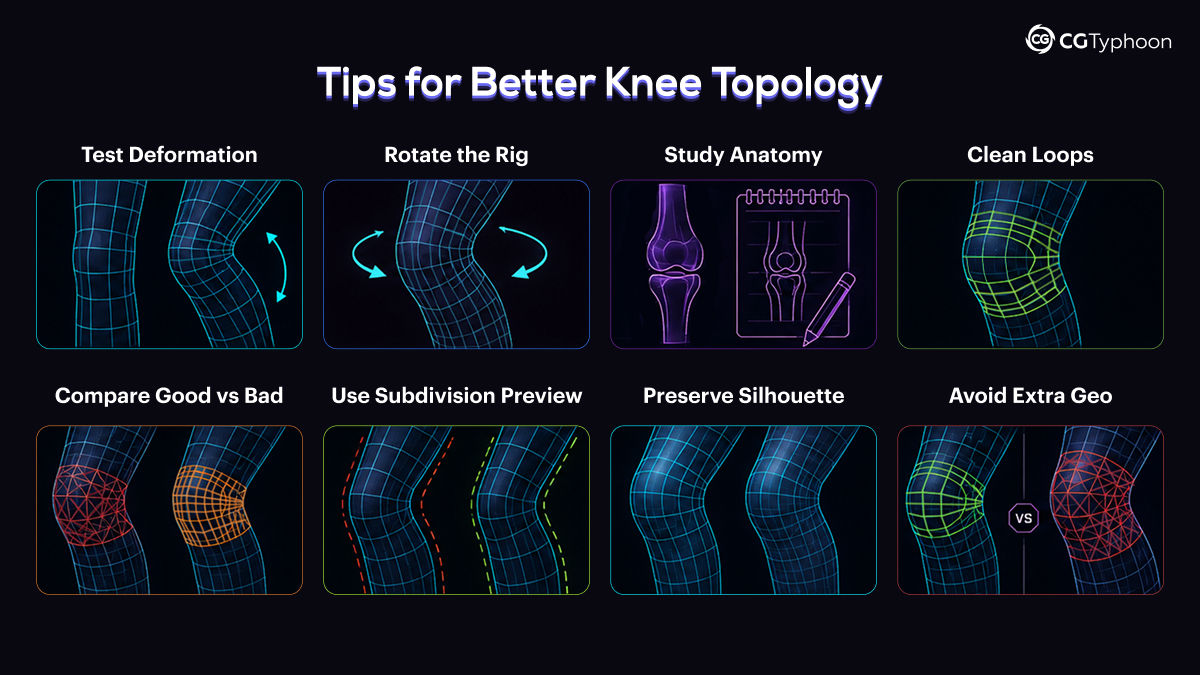
In this guide you will learn how to create deformation-friendly knee topology, organize clean edge loops, avoid common topology mistakes, and build animation-ready character meshes.
What is AI in 3D Modeling?
AI in 3D modeling refers to the use of machine learning and generative algorithms to create, modify, and optimize 3D models automatically.
Instead of manually adjusting vertices, edges, and faces, an AI 3D modeling tool can generate geometry based on text prompts, images, or existing datasets.
Modern systems use generative AI for 3D models to predict shapes, textures, and structure. This allows users to generate usable 3D assets quickly, especially for prototyping and early-stage production.
How to Create a 3D Model with AI
Creating a 3D model with AI is now accessible even for beginners. Most workflows follow a simple process:
1. Choose an AI 3D model generator
Select a tool such as Meshy, Luma AI, or Kaedim. These platforms specialize in AI-driven 3D model creation.
2. Input your data
You can:
- type a prompt (text to 3D model AI)
- upload an image (image to 3D model AI)
- use photos (create 3D model from photo workflows)
3. Generate the model
The AI automatically generates a 3D model, often including textures and materials.
4. Optimize the mesh
Most AI-generated models require cleanup, including:
- Retopology
- UV adjustments
- Polygon optimization
5. Export and use
Export your model into Blender, Unity, or Unreal Engine for further use.
Best AI Tools for 3D Modeling
Here are some of the most popular AI tools for 3D modeling:
Meshy
A powerful AI 3D model generator that creates models from text or images. Ideal for rapid prototyping and game assets.
Luma AI
Specializes in capturing real-world objects and converting them into high-quality 3D models using AI.
Kaedim
Designed for converting 2D images into production-ready 3D models, making it useful for game development.
Sloyd
A procedural generation tool that allows fast creation of customizable 3D assets.
NVIDIA Omniverse
An advanced platform that combines AI, simulation, and collaboration for professional 3D workflows.
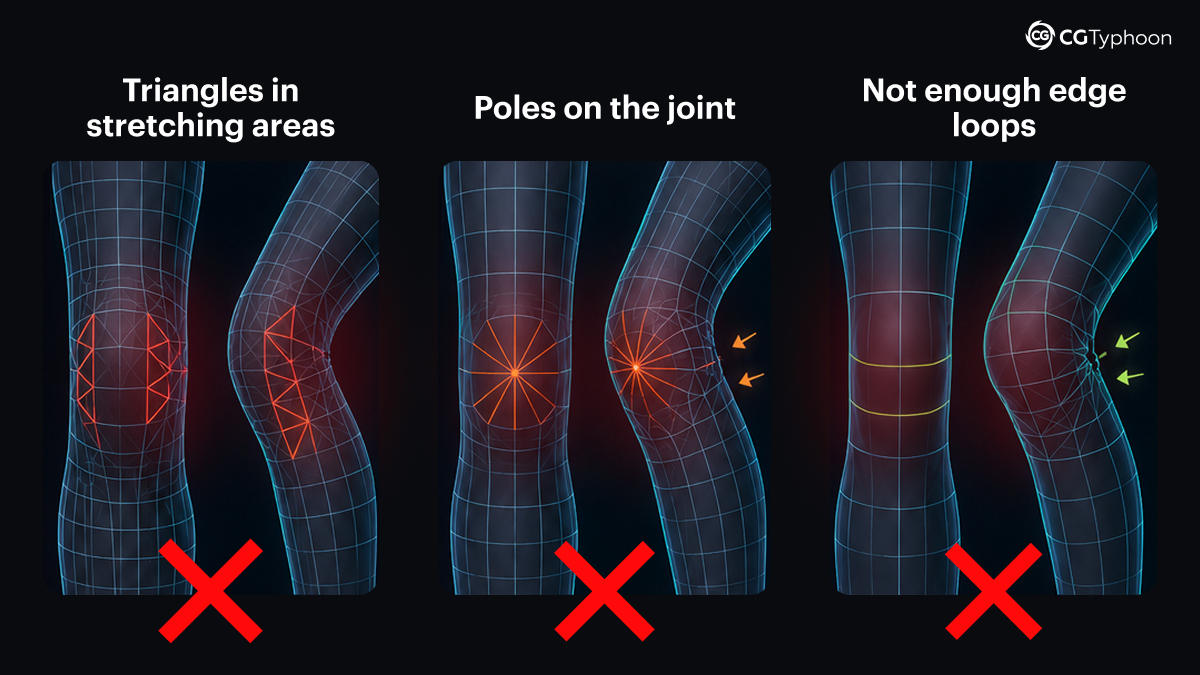
Image to 3D Model AI
One of the fastest-growing areas in AI 3D modeling is image-to-3D generation.
Using image to 3D model AI tools, you can upload a single image or multiple photos and generate a complete 3D model automatically.
Common use cases include:
- creating 3D models from photos
- scanning real-world objects
- generating assets for games and AR/VR
This approach is especially useful for beginners who want to create 3D models without mastering complex software.
Use Cases of AI in 3D Modeling
AI is widely used across multiple industries:
Game Development
Generate props, environments, and characters quickly without building everything manually.
Animation
Create background assets and speed up production pipelines.
Product Design
Develop prototypes and visualize ideas faster.
AR/VR
Produce optimized 3D assets for immersive applications.
AI vs Traditional 3D Modeling
| Feature | AI 3D Modeling | Traditional Modeling |
| Speed | Minutes | Hours or days |
| Skill required | Low | High |
| Control | Limited | Full |
| Quality | Improving rapidly | Industry standard |
AI provides speed and automation, while traditional modeling offers precision and full control.
Limitations of AI in 3D Modeling
Despite its advantages, AI still has limitations:
Poor topology
AI-generated meshes often require retopology before use in production.
Geometry errors
Models may contain artifacts or incorrect geometry.
Limited control
Fine-tuning details can be difficult.
Additional cleanup
Most assets need manual adjustments before they are ready for use.
Future of AI in 3D Modeling
AI will continue to improve and become a core part of 3D workflows. Future developments may include:
- fully automated model generation
- improved topology and mesh quality
- real-time creation tools
- deeper integration into 3D software
As the technology evolves, creating 3D models with AI may become the standard workflow.
Frequently Asked Questions (FAQ)
What is the best AI tool for 3D modeling?
Popular tools include Meshy, Luma AI, and Kaedim, depending on your needs.
Can AI create 3D models automatically?
Yes, AI can generate models from text prompts, images, or photos.
Can AI replace 3D artists?
No. AI speeds up workflows, but skilled artists are still needed for quality and control.
Conclusion
AI for 3D modeling is changing how 3D assets are created, allowing artists to generate models faster than ever before. By using the right AI tools and combining them with traditional workflows, you can dramatically improve your speed without sacrificing quality.
If you’re just getting started, try one of the AI 3D model generators mentioned above and experiment with creating your first models today.